Building a website is much like constructing a building. It requires meticulous planning, a solid foundation, and attention to detail that ensures every piece works together harmoniously. That solid foundation begins with wireframes. This article is a step by step guide on how to create wireframes, serving as your blueprint for building impressive and engaging digital experiences.
Just as an architect wouldn’t dream of erecting a building without a blueprint, a web designer shouldn’t bypass wireframes. They are the skeletal framework that holds your website together, shaping its form and functionality. Skipping this stage can result in a disjointed site, leading to a bad user experience and potential confusion.
We’ll cover everything from initial user research and sketching layouts to honing high-fidelity wireframes. By understanding and harnessing the power of wireframing, you’ll be well-equipped to create websites that are not only aesthetically pleasing but also user-friendly and purposeful.
Let’s begin this exploration into wireframing and discover how it paves the way for standout web experiences.
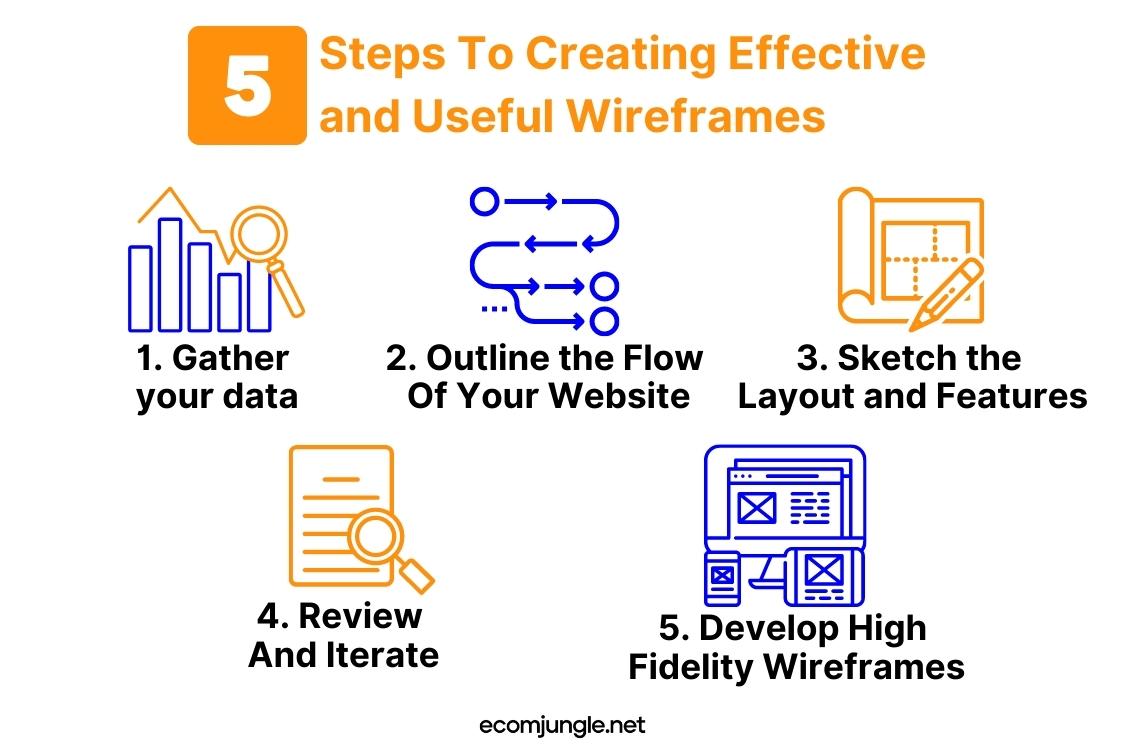
5 Steps To Creating Effective & Useful Wireframes
1. Gather your data
Starting the process of creating a wireframe requires thorough data collection, laying the groundwork for your design strategy.
Start with UX Considerations
Embarking on your design journey begins with thinking about the User Experience (UX) that you aim to deliver. Suppose you’re designing an e-commerce platform. You need to envisage the user’s path, from landing on your homepage, exploring product listings, and adding items to their cart to completing the checkout process.
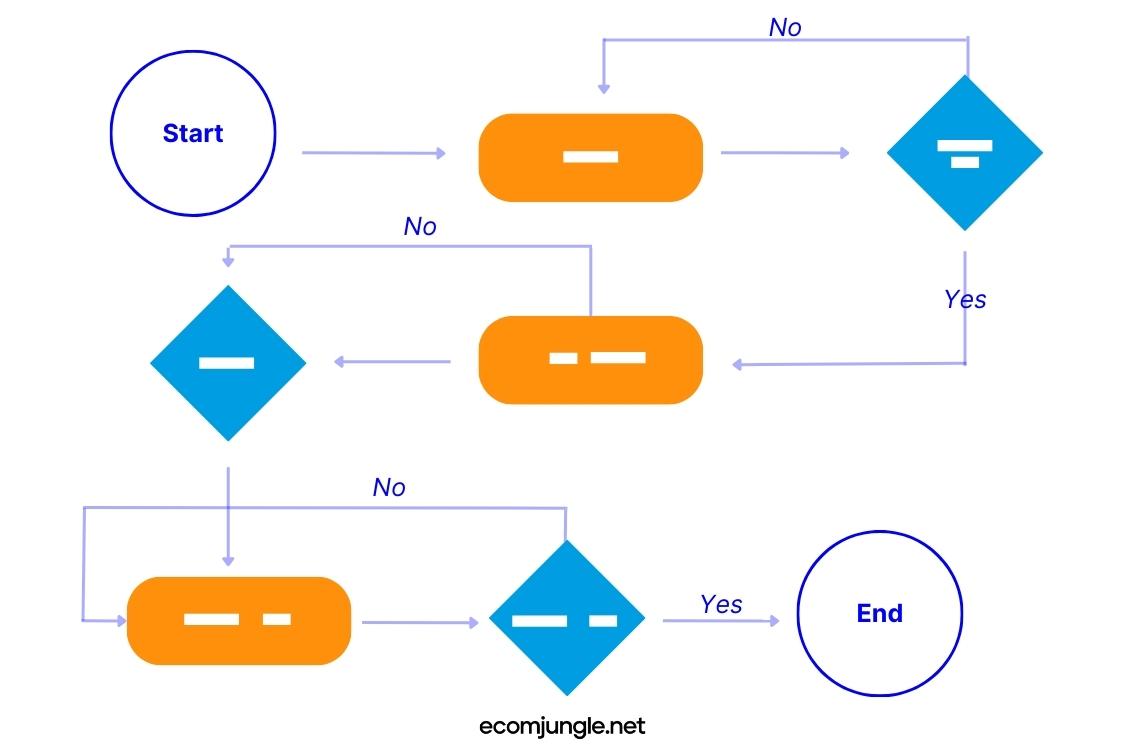
These are all significant UX touchpoints that demand careful thought and design. For instance, the path to finding a desired product should be intuitive, and the checkout process should be seamless to reduce cart abandonment.
User Research to Determine Audience
An important part of your data collection involves conducting user research to better understand your audience. This could involve methods like surveys or focus groups. For instance, you could survey potential users about their online shopping habits, ask them about their favorite e-commerce sites, and understand what they consider important when shopping online.
Define User Personas
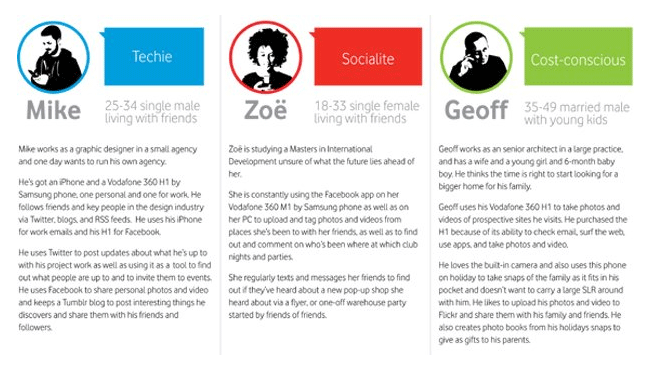
After conducting user research, it’s essential to develop user personas. These are essentially fictional representations of your ideal customers.
For an e-commerce platform, your personas might include ‘Budget Shopper Bella,’ who is price-conscious and always on the hunt for the best deals, or ‘Impulsive Shopper Ian,’ who frequently makes unplanned purchases based on effective product recommendations.
Pro Tip:
Make your personas as comprehensive as possible. They should include details about their shopping behaviors, preferences, pain points, and what motivates them. A well-defined persona can provide a solid understanding of your users and serve as a reference point throughout the design process.
Outline Use Cases
With your user personas in place, the next step is to outline use cases. Use cases help you understand the various ways your product might be used.
For example, how does ‘Budget Shopper Bella’ navigate your website to find the best deals? How does your platform facilitate ‘Impulsive Shopper Ian’ in making those unplanned purchases?
Competitor and Industry Research
Finally, don’t forget to undertake competitor and industry research. Identify leading e-commerce sites and examine their user experience, design layout, and unique features. This can provide valuable insights into market trends, what your potential customers might already be familiar with, and areas where competitors might be falling short.
Pro Tip:
Your aim shouldn’t be to mirror your competitors’ strategies. Instead, use your findings to identify gaps in the market that your platform can fill. This could be a unique feature that no one else offers, an exemplary user experience, or a specific demographic that hasn’t been targeted effectively. Being innovative and unique is key to standing out in a saturated e-commerce market.
2. Outline the Flow Of Your Website
Defining the overall flow of your website is the next major step in the wireframing process. Without a clear understanding of the number of screens and the user journey, your wireframing efforts could quickly become disorganized and directionless.

A clear and logical user flow is the roadmap that will guide your users from their entry point on your website to the final desired action, such as making a purchase or signing up for a newsletter. This entry point may be dictated by the marketing channel and messaging used to attract users, so consider that as well.
Challenging Changes
The tricky aspect of outlining your website’s flow is understanding that the elements you add might undergo multiple changes as you refine the design. This inherent flux in the design process can feel a bit uncertain.
One way to mitigate this is by referencing related interfaces—studying designs with similar features or user flows can provide a sense of direction. You can learn from these existing models and adapt their strengths to your own design, helping to form a more concrete idea of your site structure and reducing the number of drastic changes needed later on.
Information Architecture
An important part of outlining your website’s flow is developing a solid information architecture (IA). Information architecture refers to the structure and organization of your website, which helps users navigate and find what they’re looking for efficiently.
For instance, consider a typical e-commerce site. The information architecture might start with a home page, branching out into various product category pages. For example:
- Men’s Clothing
- Women’s Clothing
- Electronics
Each category could then further break down into sub-categories like:
- Men’s Shirts
- Women’s Dresses
- Laptops
From there, users can navigate to individual product pages.
You can arrange content using various strategies such as a hierarchical structure, topical grouping, or sequential order. Whichever method you choose, it’s vital to maintain consistency across your website to provide a reliable and predictable user experience.
Benefits of Thoughtful IA
A well-thought-out IA helps address several key user and business needs:
- User Understanding – Good IA helps users understand where they are, what they’ve found, what’s around, and what to expect. For instance, a user looking for ‘Men’s Shirts’ can easily identify where to go from the home page if the IA is designed with the user in mind.
- Usability and Accessibility – A clear IA makes a website easier to navigate, significantly improving usability and accessibility. Users should be able to find what they need in an intuitive and natural way. This leads to a better user experience.
- Search Engine Optimization (SEO) – Good IA can improve a site’s SEO performance. Search engines can better understand and index a well-structured site, improving its visibility in search results.
- Conversion Rate Optimization (CRO) – A logical flow, guided by a robust IA, can help lead users to desired actions more effectively, ultimately improving conversion rates.
Developing good information architecture isn’t just a preparatory step; it’s a crucial component of an effective, user-friendly website.
3. Sketch the Layout and Features, then Create Initial Wireframe(s)
Once you’ve gathered your data and outlined the overall flow of your website, the next step is to start sketching your layout and features, essentially creating a simple visual representation of your web pages.
Sketch the Layout and Features
Start with a basic sketch of your website’s layout, which will act as a blueprint for your design. At this stage, you’re not aiming for perfection but rather trying to translate your ideas onto paper. Think about where major features will go and what the page layout will look like.
For instance, where will the navigation menu be? Where should the call-to-action button be placed to be most effective? Where will your conversion points be? If it’s an e-commerce site, consider where the product images, descriptions, reviews, and ‘Add to Cart’ button will be located on the product page.
Paper Sketches
Paper sketches are a great way to start wireframing without getting overwhelmed. Don’t worry about getting every detail right; the aim is to get a general sense of space, structure, and flow. Remember, these are not the final designs but preliminary sketches to map out your ideas.
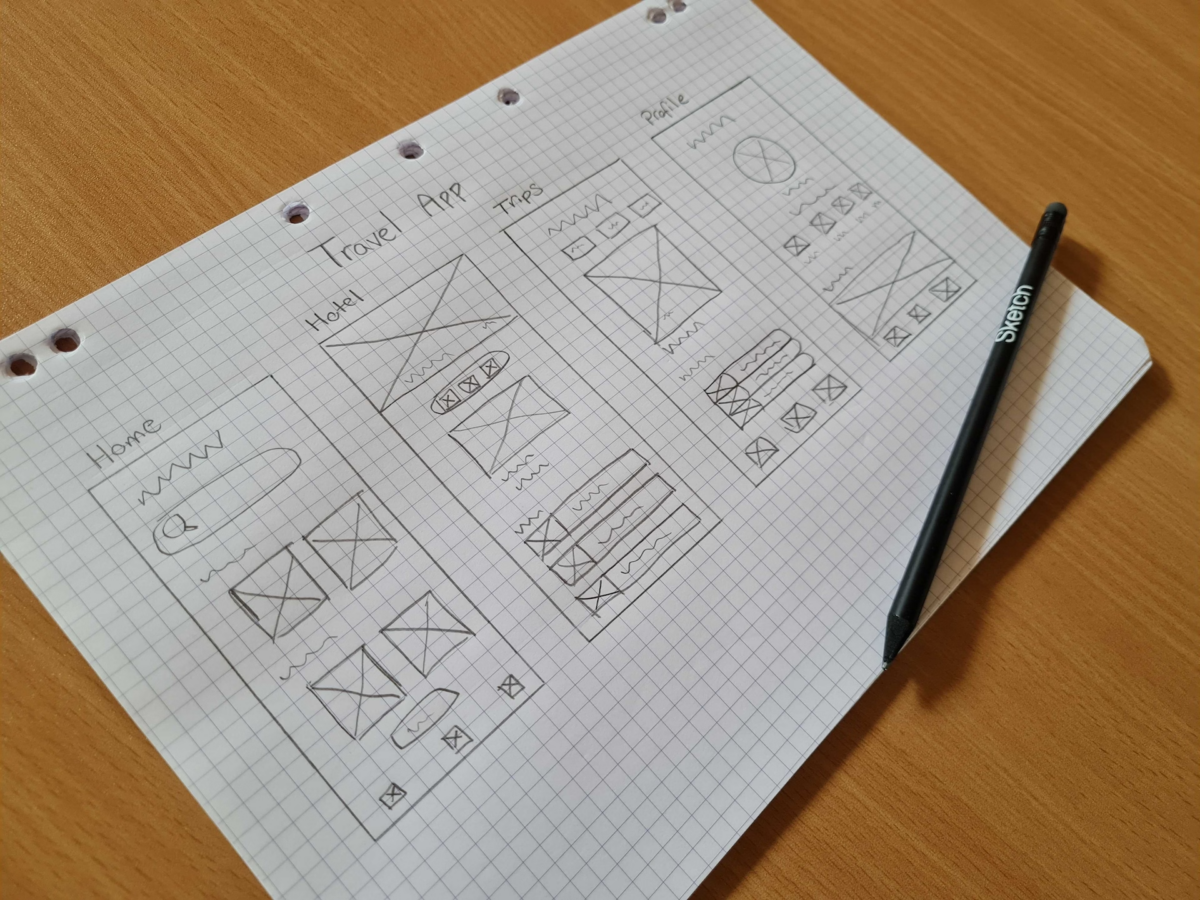
Paper sketches allow for easy adjustments and are an efficient way to test out different layouts and ensure you have all the elements you need before committing to a design:
- The cheapest method to get started. All you need is a pencil and paper
- Collaboration is easy
- Complete design freedom, no programming or software limitations
- Quickly express ideas and create wireframes in one sitting
Wireframing Tools
While paper sketches are great for initial brainstorming, digital wireframing tools offer a more precise approach to design. These tools facilitate the creation of clean, easily adjustable low fidelity wireframes and are especially useful as your design moves into more advanced stages.
When you start using wireframe tools, it’s crucial to remember that, much like paper sketches, your aim isn’t to create the perfect design right off the bat. Instead, you’re working on translating your paper sketches into a digital format, which allows for a more detailed exploration of space, structure, and flow.
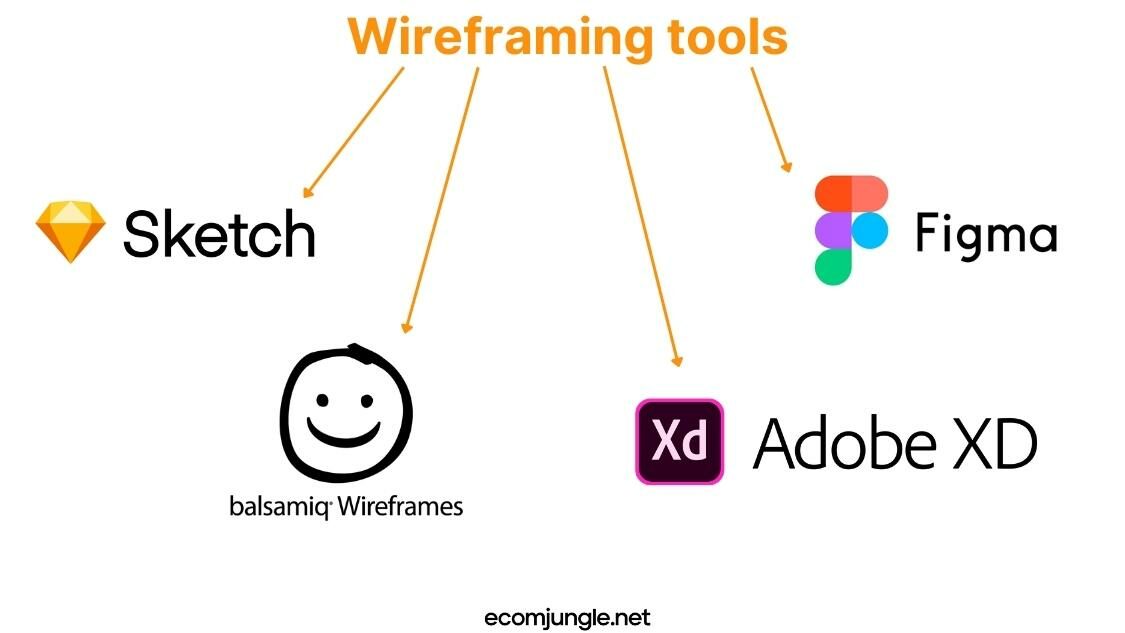
There are several popular wireframing tools available such as Sketch, Balsamiq, Figma, and Adobe XD. These tools offer a range of features, such as drag-and-drop interfaces, a wide variety of pre-made wireframe templates, and components that can significantly streamline your design process.
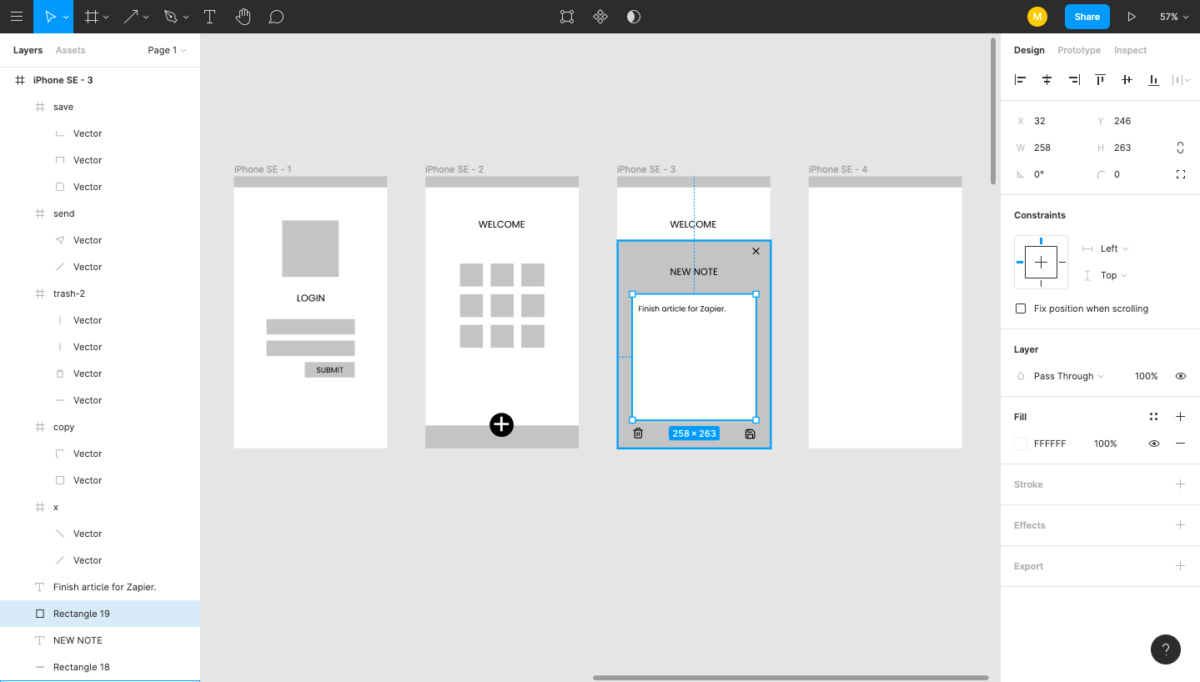
For instance, if you’re designing an e-commerce site, you can use these tools to create a more detailed wireframe of a product page, complete with placeholders for images, text, buttons, and other elements.
One of the key benefits of digital wireframing tools is the ease of making adjustments. Designs can be rapidly iterated on, components can be re-used across different pages, and layouts can be tweaked with just a few clicks.
Recommendations
Here are some key recommendations
- Start with Pen and Paper – Begin with rough sketches to quickly visualize the basic structure of your website.
- Move to Digital – Translate your sketches into a digital format using wireframing tools for precision and flexibility.
- Choose the Right Canvas Size – Consider your audience’s devices and screen sizes to choose an appropriate canvas size.
- Low Fidelity or High Fidelity wireframes – Start with lo-fi wireframes for initial brainstorming, then you’ll be moving to hi-fi wireframes for detailed design and interactivity later on.
- Common Key Elements – Include essential elements like navigation, content areas, CTA buttons, and headers/footers, regardless of your wireframe’s specific design. These help ensure your website is functional and user-friendly.
4. Review And Iterate
After creating your wireframes, it’s time to review them critically, seek feedback, and make necessary adjustments. The review and iteration phase helps your team turn good wireframes into great ones.
Start by reviewing the wireframes yourself. Do they align with the goals and user personas you defined earlier? Do they reflect the user journey and site flow you envisioned? Is your site’s main message obvious to users? It can be helpful to put yourself in the user’s shoes, navigating through your wireframes to identify any potential challenges or points of confusion.
Next, seek feedback from others. This can include project managers, development teams, or even potential users. Diverse perspectives can highlight issues you might have overlooked and provide valuable insights to enhance usability. Tools like Figma and Adobe XD allow you to share your wireframes and collect feedback directly on the designs.
Once you’ve gathered feedback, it’s time for iteration. Make the necessary adjustments to your wireframes based on the input you’ve received. Remember, wireframing is an iterative process—each round of feedback and revision brings you closer to a design that effectively meets user needs and business goals.
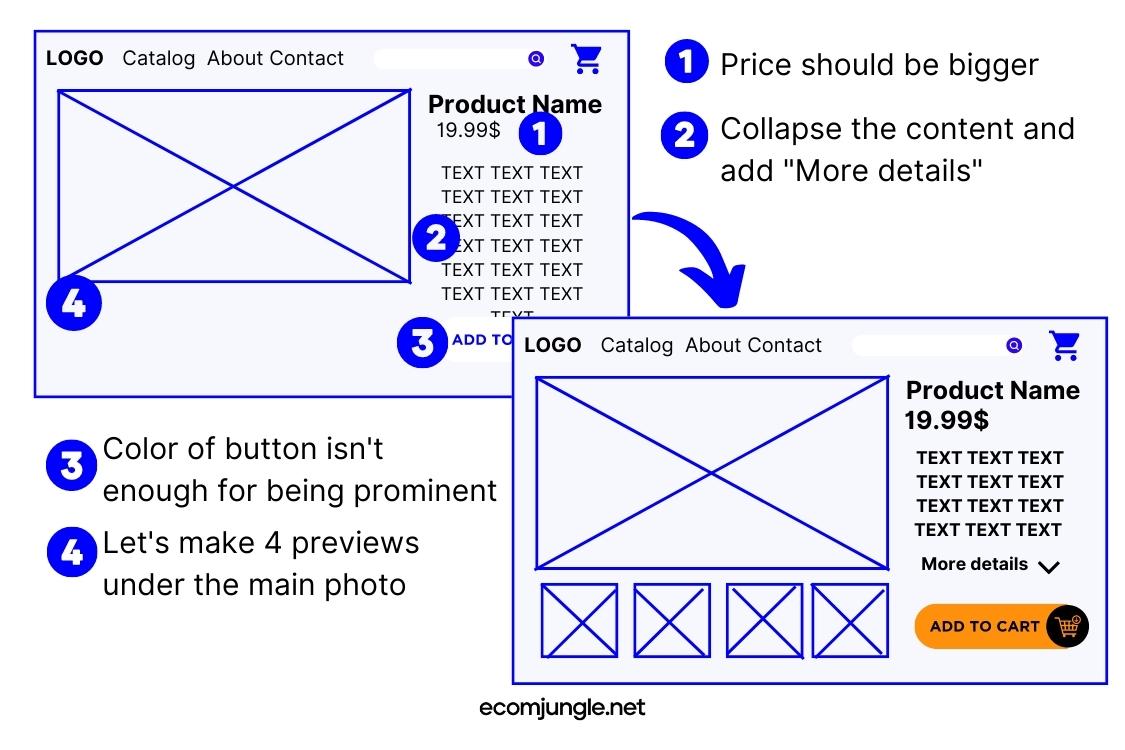
After several rounds of reviews and iterations, your wireframes should be solid foundations for moving into the more detailed design and development phases. Keep in mind that it’s more efficient and cost-effective to make changes during the wireframing stage than after development has begun.
5. Develop High Fidelity Wireframes
Once you’ve reviewed and iterated on your initial wireframes, the next step is to create high-fidelity (hi-fi) wireframes using a digital wireframing tool. These are more detailed and polished versions of the design you created in the previous steps and provide a closer representation of the final product.
Hi-fi wireframes include more specific visual design elements compared to their low-fidelity counterparts. They incorporate exact sizing and spacing, precise image placement, and may include typography and colors in wireframes. While they’re still not fully-designed high-fidelity mockups, hi-fi wireframes give a clearer idea of how your website will look and feel when it’s finished.
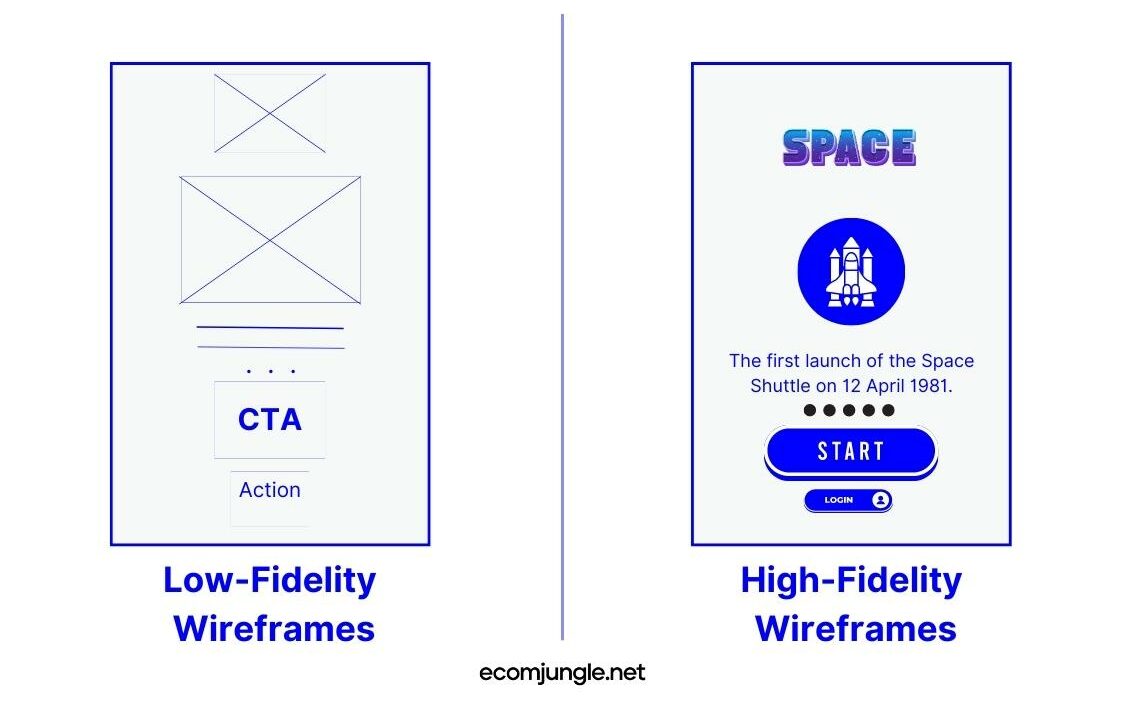
In addition to visual refinement, hi-fi wireframes often include interactive elements.
For example, you might create clickable buttons that lead to different sections of your site or display dropdown menus. This interactive layer allows for more detailed user testing and a better understanding of how your website will function in practice.
Creating hi-fi wireframes also provides an opportunity to align your design with your brand. This can include using your brand’s color scheme, fonts, logo, or style of imagery. Remember, even though a wireframe is not a final design, it’s still a representation of your brand and should feel cohesive and on-brand.
Creating high-fidelity wireframes is a significant milestone in the design process, marking the transition from abstract ideas to a concrete, interactive representation of your website.
As you progress in this phase, you’ll gain a stronger sense of your website’s ultimate design and functionality, preparing you for the subsequent stages of prototyping and development.
Takeaways
The wireframing process is a fundamental pillar of website design, acting as a dynamic roadmap for the journey from initial concept to fully-realized design.
It paves the way for the establishment and iterative refinement of your site’s structure and functionality, laying down a robust foundation before you delve into the more intricate layers of detail and design complexity.
- Start simple – Begin with basic sketches to visualize your ideas and then translate these into digital wireframes.
- Review and iterate – Regularly review your wireframes and make necessary adjustments based on feedback and testing.
- Consider your users – Always keep your users at the forefront, ensuring the design meets their needs and provides an intuitive and satisfying experience.
- Advance to high-fidelity – Transition to high-fidelity wireframes to refine the visual and interactive elements, getting you closer to the final design.
Conclusion
In the world of web design, wireframing is not just a step but a leap toward turning ideas into tangible, interactive experiences.
It’s a journey that starts with simple sketches and moves through iterative refinement, always with the user at the heart of the design. Whether low-fidelity or high-fidelity, each wireframe is a building block toward a well-structured, engaging, and user-friendly website.
Embrace the process, welcome feedback, and let the power of wireframing guide you toward a design that truly resonates with your audience.
Frequently Asked Questions
To construct a wireframe, you need a user persona for defining the target group, a user journey map to understand how the user interacts with the product, a sitemap or information architecture for existing products, and the business goals that outline the necessary features or elements.
Wireframes generally use placeholder images represented by crossed rectangles. These placeholders indicate that specific images will either be selected in later stages of the design process or added by the users themselves.
A wireframe is a blueprint used in early development stages to plan content layout and functionality on a page, considering user needs and journeys. It provides a basic structure of a page before the addition of visual design and content.